35 Halloween Painted Rocks | Fun & Spooky Ideas
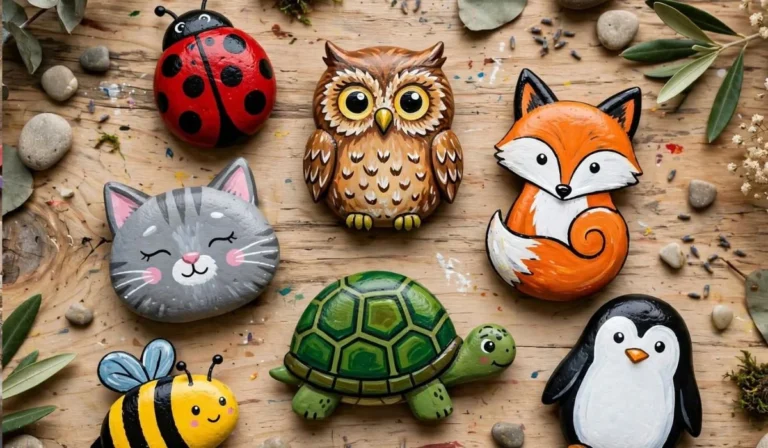
Halloween painted rocks are a fun way to turn ordinary stones into tiny seasonal decorations. They can be displayed in gardens, on porches, along walkways, in craft baskets, or even used as small Halloween party decorations. Because rocks provide a naturally solid surface, they are especially suitable for acrylic paint, fine-detail brushes, paint pens, and protective sealers.
From spooky ghosts and creepy monsters to pumpkins, bats, and cute Halloween characters, there are countless ways to decorate rocks for October. The ideas below are divided into four categories so you can choose between classic spooky designs, cute characters, Halloween scenes, and simple beginner-friendly projects.
Spooky Halloween Painted Rocks:
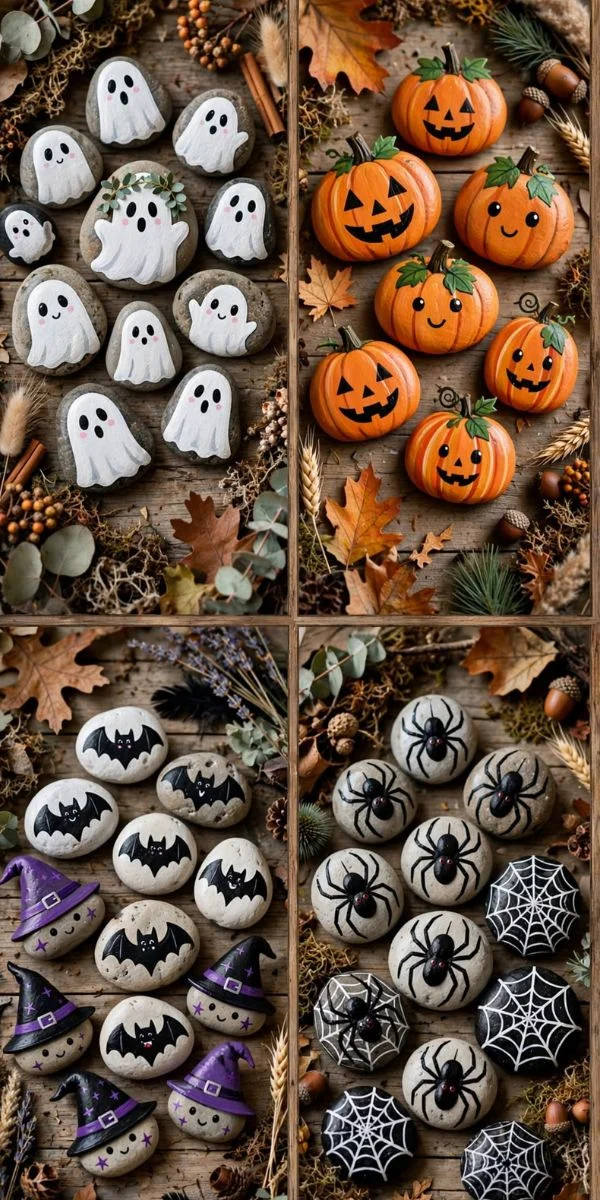
1. Classic Jack-O’-Lantern Rock
Turn a smooth, rounded rock into a miniature jack-o’-lantern. This is one of the easiest Halloween painted rocks because the basic design only requires orange, black, and a small amount of green paint.
Painting Details
Cover the rock with orange acrylic paint and allow it to dry completely. Paint a black triangle nose, triangular or curved eyes, and a crooked smiling mouth. Finish with a small green stem and a protective clear coat.
2. Friendly Ghost Rock
A white ghost painted on a dark stone creates a simple Halloween decoration with strong contrast.
Painting Details
Use white acrylic paint for the ghost’s body and black paint for two eyes and a small mouth. Leave some of the natural rock visible around the edges to create an organic border.
3. Black Cat Rock
Black cats are classic Halloween imagery and work especially well on elongated or oval stones.
Painting Details
Paint the entire rock black and add pointed ears with a fine brush. Use yellow, green, or white for the eyes. Tiny whiskers can be drawn with a white or light-gray paint pen after the base coat dries.
4. Spooky Eyeball Rock
Create a creepy oversized eyeball using a white base and a colorful iris.
Painting Details
Paint the stone white first, then add a circular blue, green, or brown iris. Outline it with black and add a small black pupil. Thin red veins around the eye can create a more unsettling Halloween appearance.
5. Haunted Skull Rock
A skull design can transform a flat stone into a miniature Halloween prop.
Painting Details
Use black as the background and paint a white skull over it. Add hollow eye sockets, a small triangular nose, and simple teeth. A gray shadow around the skull can provide additional depth.
6. Witch Hat Rock
A witch hat is an excellent design for narrow or triangular-shaped stones.
Painting Details
Paint the hat black or deep purple and add an orange, green, or yellow band. A few small stars can be painted around the hat to give the rock a magical Halloween theme.
7. Creepy Spider Rock
Spiders can be painted with surprisingly simple shapes, making them suitable for beginners.
Painting Details
Use black paint for the spider’s round body and eight thin legs. Add a few tiny white eyes and place the spider on an orange, purple, or gray background.
8. Vampire Rock
Give a small stone a vampire face with pale skin, dark hair, and sharp teeth.
Painting Details
Start with a pale gray or cream face. Add black hair, dark eyebrows, red eyes, and two small white fangs. A red collar around the bottom of the rock can complete the character.
9. Mummy Rock
Wrap a rock visually in layers of painted bandages to create a miniature mummy.
Painting Details
Use beige or off-white as the base. Paint irregular horizontal and diagonal lines across the surface and leave small gaps between them. Add two dark eyes peeking through one opening.
Cute and Fun Halloween Painted Rocks:
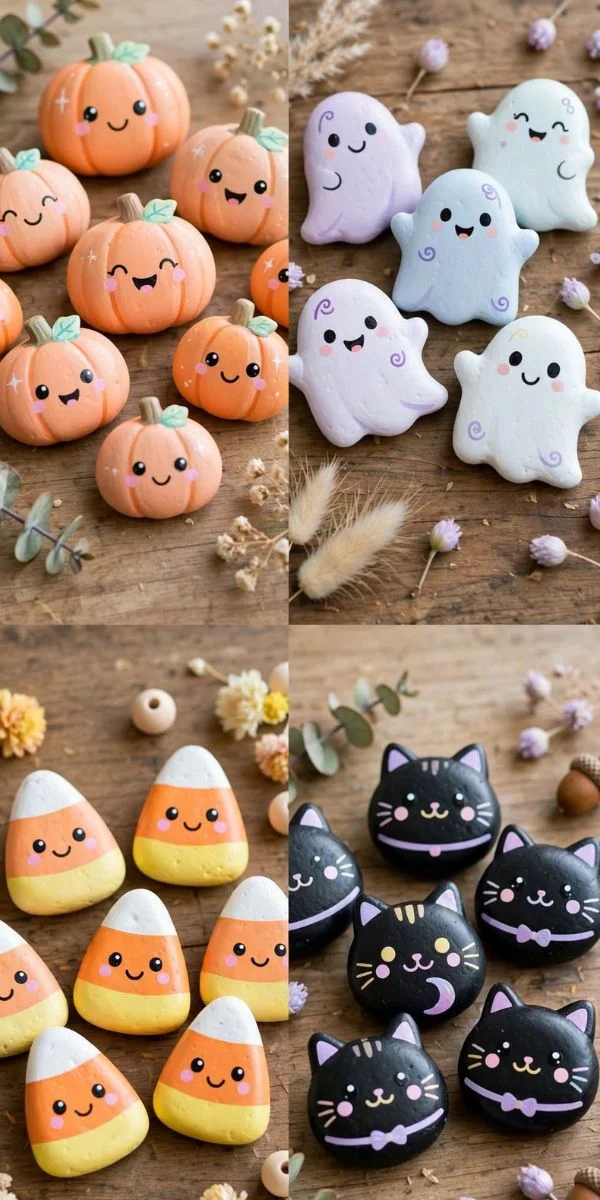
10. Cute Pumpkin Face Rock
For a less frightening decoration, create a cheerful pumpkin with large eyes and a smiling expression.
Painting Details
Use bright orange for the pumpkin and black or dark brown for the face. White highlights on the eyes can make the character look more playful. Add tiny green leaves near the top.
11. Ghost With a Pumpkin
Combine two recognizable Halloween symbols on one stone by painting a little ghost carrying a pumpkin.
Painting Details
Use a dark purple or midnight-blue background. Paint the ghost in white and add a small orange pumpkin in its hands. Tiny yellow stars can fill the empty background.
12. Halloween Owl Rock
An owl with oversized eyes can become an adorable Halloween decoration.
Painting Details
Paint the owl brown, gray, purple, or black. Use large circular eyes with bright yellow or orange irises. Add a tiny witch hat for an extra seasonal touch.
13. Monster Face Rock
Create your own friendly Halloween monster instead of copying a traditional character.
Painting Details
Choose an unusual base color such as green, purple, blue, or orange. Add one large eye, crooked teeth, horns, spots, or tiny ears to make the monster unique.
14. Candy Corn Rock
Candy corn has a simple three-color structure that makes it easy to reproduce on a stone.
Painting Details
Paint the rock white at the pointed end, orange through the middle, and yellow toward the wider bottom section. Use a fine brush to keep the color boundaries clean.
15. Cute Bat Rock
A small bat silhouette can look charming rather than frightening.
Painting Details
Use black or dark purple for the bat and add two small white or yellow eyes. A warm orange background can make the silhouette stand out.
16. Frankenstein Rock
Create a cute Frankenstein-inspired face using green skin and dark hair.
Painting Details
Paint the stone green and add black hair across the top. Draw thick eyebrows, circular eyes, a simple nose, and a stitched smile. Small black lines along the sides can suggest the classic bolt-and-stitch look.
17. Halloween Ghost Family
Paint several tiny ghosts together on one large stone to create a little Halloween family.
Painting Details
Use different ghost sizes and facial expressions. Some can smile, while others can look surprised or sleepy. A purple or navy background makes the white figures easier to see.
18. Witch Cat Rock
Combine a black cat with a tiny witch hat for a playful Halloween character.
Painting Details
Paint a black cat silhouette with bright eyes and add a purple or orange witch hat. A few tiny stars around the cat can turn the stone into a miniature magical scene.
Halloween Scene and Character Rocks:
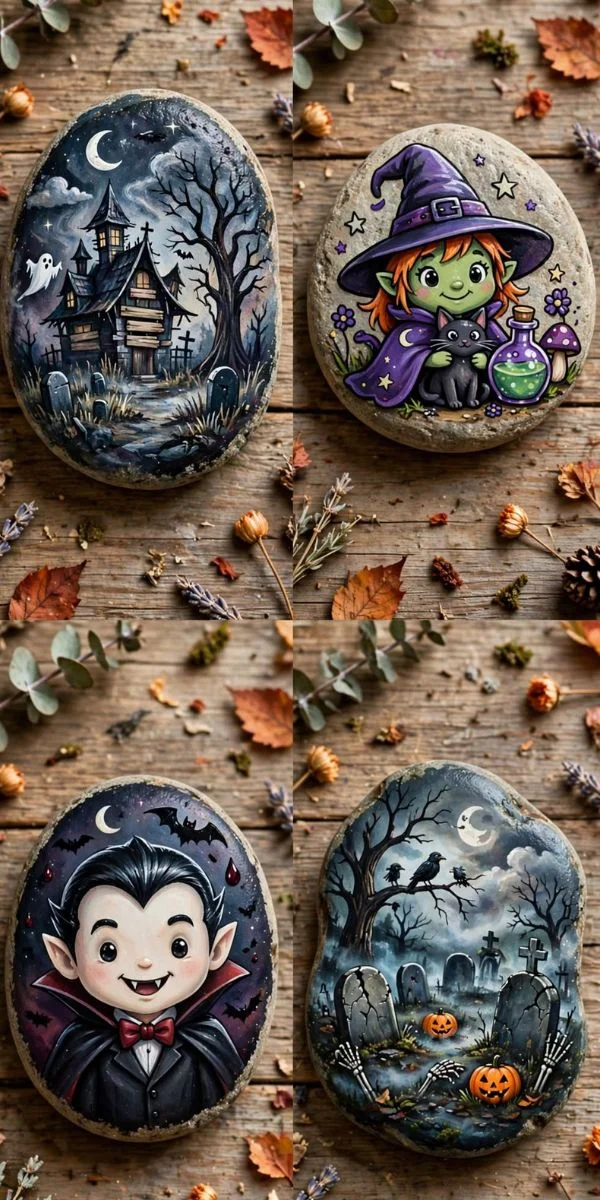
19. Haunted House Rock
Paint an entire haunted house scene on a wide, flat stone.
Painting Details
Use black or dark blue for the background. Add a crooked house with yellow windows, a pointed roof, bare trees, and a small moon. Fine paint pens are useful for windows and architectural details.
20. Full Moon Bat Scene
Create a dramatic night scene with bats flying across a large moon.
Painting Details
Paint the rock dark navy or black. Add a large pale yellow or cream moon and several black bat silhouettes. Small white dots can represent distant stars.
21. Graveyard Rock
A miniature graveyard can turn one stone into a complete spooky landscape.
Painting Details
Paint several gray gravestones against a dark background. Add crooked trees, tiny bats, and a pale moon. Use lighter gray on one side of each gravestone to create basic shading.
22. Pumpkin Patch Rock
Paint multiple pumpkins across a garden-like Halloween scene.
Painting Details
Use orange pumpkins in different sizes and add green stems and leaves. A dark brown ground line and deep green vines can make the scene look more dimensional.
23. Witch Flying Over the Moon
A flying witch silhouette creates a recognizable Halloween scene without requiring complex facial details.
Painting Details
Use a large yellow moon behind the witch. Paint the witch and broomstick as dark silhouettes. Add a few flying bats or stars to fill the remaining space.
24. Haunted Tree Rock
A twisted tree can create an eerie Halloween atmosphere.
Painting Details
Use dark brown or black branches against an orange, purple, or navy background. Add a pale moon behind the branches and a few falling leaves or flying bats.
25. Potion Bottle Rock
Turn a stone into a colorful magical potion bottle.
Painting Details
Paint the bottle in purple, green, blue, or orange. Add a dark outline and a small cork at the top. Tiny bubbles, stars, or a glowing-looking liquid effect can make the design more interesting.
26. Halloween Cemetery Cat
Paint a black cat sitting quietly beside a gravestone.
Painting Details
Use a dark blue background with a pale moon. Place the cat in silhouette and add glowing yellow eyes. A few small pumpkins near the gravestone provide warm color contrast.
27. Trick-or-Treat Rock
Create a miniature trick-or-treating scene with a Halloween character carrying a candy bag.
Painting Details
Use bright orange, purple, black, and yellow. A small childlike silhouette or cartoon monster can carry a pumpkin-shaped candy bucket while tiny candy pieces decorate the surrounding area.
Simple Halloween Painted Rocks for Beginners:
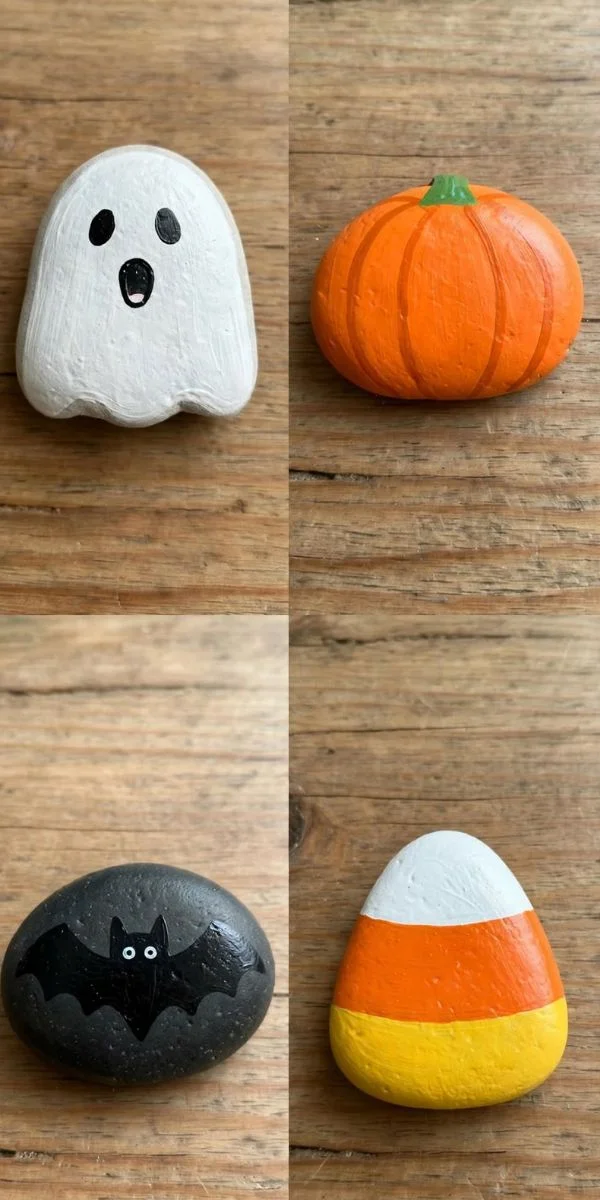
28. Polka Dot Pumpkin Rock
A pumpkin covered in colorful dots is easier than detailed facial artwork.
Painting Details
Paint the stone orange and allow it to dry. Add black, yellow, white, or dark-purple dots using the rounded end of a brush or a dotting tool. Finish with a simple green stem.
29. Halloween Striped Rock
Use alternating Halloween colors to create a graphic striped stone.
Painting Details
Try black and orange, purple and green, or black and white. Painter’s tape can help create cleaner lines if the rock has a relatively flat surface.
30. Simple Spiderweb Rock
A spiderweb can be created with a few intersecting lines.
Painting Details
Start with a black or dark-purple background. Draw several lines radiating from one point, then connect them with curved lines to form the web. Add a tiny spider in one corner.
31. Mini Pumpkin Trio Rock
Paint three simple pumpkins across one stone for a quick seasonal project.
Painting Details
Use three shades of orange or repeat one orange shade with different facial expressions. Add green stems and a few small leaves between the pumpkins.
32. Halloween Candy Rock
Create a colorful collection of tiny Halloween candies on a light background.
Painting Details
Paint wrapped candies using orange, purple, yellow, green, and pink. Black outlines help separate individual pieces and make the small shapes easier to recognize.
33. BOO Lettering Rock
Turn a smooth rock into a simple Halloween message.
Painting Details
Paint the stone white, orange, purple, or black and write “BOO!” in large contrasting letters. Add tiny bats, stars, pumpkins, or ghost faces around the lettering.
34. Halloween Moon Rock
A simple crescent moon can create an elegant Halloween decoration without complicated character painting.
Painting Details
Use a dark navy or black background and paint a cream or pale-yellow crescent moon. Add tiny stars and a few miniature bats for a finished night-sky design.
35. Cute Halloween Mix Rock
Combine several small Halloween symbols into one colorful composition.
Painting Details
Paint tiny pumpkins, ghosts, bats, stars, candy, and leaves across the stone. Keep the individual elements small and use a consistent palette of orange, black, white, purple, and green.
Choosing the Best Rocks for Halloween Painting
Smooth, relatively flat stones are generally easier to paint because the brush can move across the surface more consistently. Rounded rocks can also work well for pumpkins, eyeballs, ghosts, and character faces.
Before painting, wash away dirt and debris and let the rock dry completely. A clean, dry surface helps acrylic paint adhere more consistently.
Paint and Tools You Can Use
Acrylic paint is a practical choice for decorative rock painting because it dries relatively quickly and is available in many colors. Small round brushes are useful for outlines and facial details, while flat brushes work better for larger background areas.
Paint pens can make lettering, tiny eyes, outlines, and decorative patterns easier. A dotting tool or the end of a brush can also create consistent circles for eyes and polka dots.
How to Seal Halloween Painted Rocks
A protective sealer can help reduce damage from handling, moisture, and outdoor exposure. Allow all paint layers to dry fully before applying the sealer.
For rocks intended for outdoor decoration, choose a sealer specifically suitable for the conditions where the rock will be displayed. Apply thin, even coats according to the product instructions.
Easy Color Combinations for Halloween Rocks
Traditional Halloween colors include black, orange, purple, green, white, and deep red. You can also create softer designs using cream, muted orange, dusty purple, brown, and gray.
For high contrast, combine black with orange or white. For a magical appearance, purple and dark blue work well with silver or pale yellow. Cute designs can use brighter versions of traditional Halloween colors.
How to Add Detail Without Making Rocks Look Messy
Work from large shapes to small details. Paint the background first, then the main character or object, followed by outlines, facial features, highlights, and tiny decorations.
Allow each layer to dry before adding another color. This prevents wet acrylic colors from mixing unintentionally and makes fine details easier to control.
Ideas for Displaying Halloween Painted Rocks
Finished rocks can be arranged around potted plants, placed beside a front-door walkway, grouped on a Halloween table, or displayed in a decorative bowl.
A collection can also follow one theme. For example, you could create a pumpkin set, a group of ghosts, a haunted-house collection, or several cute Halloween characters in matching colors.
FAQs About Halloween Painted Rocks
What kind of paint is best for Halloween painted rocks?
Acrylic paint is commonly used for decorative rock painting because it is versatile and available in many colors. Paint pens are particularly useful for small details and lettering.
Do rocks need to be cleaned before painting?
Yes. Wash away dirt, dust, and loose particles before painting, then allow the rock to dry completely. A clean surface provides a better starting point for decoration.
Can Halloween painted rocks be placed outside?
They can be displayed outdoors, but exposure to rain, sunlight, temperature changes, and handling can affect painted surfaces. A suitable outdoor sealer can provide additional protection.
What Halloween rock is easiest for beginners?
Simple pumpkins, ghosts, candy corn, polka dots, BOO lettering, and basic spiderwebs are good starting designs because they rely on relatively simple shapes.
Can I use paint markers on rocks?
Yes. Paint markers can be useful for outlines, lettering, facial features, tiny stars, and other small details. Allow the paint to dry according to the marker instructions before sealing.
How long should painted rocks dry before sealing?
Drying time depends on the paint, layer thickness, temperature, and humidity. Make sure every layer feels completely dry before applying a sealer.
What colors make Halloween rocks stand out?
Black, white, orange, purple, green, and yellow provide strong Halloween contrast. A dark background with bright details can make small designs particularly noticeable.
Can children make Halloween painted rocks?
Yes, rock painting can be adapted for children using simple designs such as pumpkins, ghosts, monsters, and colorful dots. Adult supervision is appropriate when using small tools, paint products, or sealers.