20 Rose Embroidery Tutorial | Easy Floral Stitch Ideas


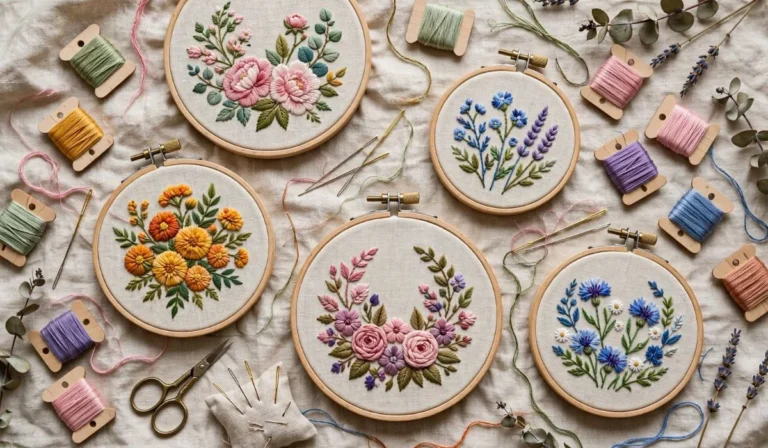
Rose embroidery is a timeless way to bring floral detail, texture, and color to fabric. From tiny line-art roses to dimensional thread flowers, there are many ways to interpret the classic rose using hand embroidery.
A rose does not have to be complicated to look beautiful. Simple backstitch outlines can create a minimalist flower, while satin stitch, woven wheel roses, French knots, and layered stitches can produce more detailed designs.
These 20 rose embroidery tutorials explore different shapes, techniques, color combinations, and project ideas. They are suitable for beginners who want to practice basic stitches as well as experienced stitchers looking for new floral patterns.
Simple Rose Embroidery Tutorials
1. Minimal Outline Rose
Start with a simple rose drawn using a continuous collection of curved lines. Trace the design with backstitch or split stitch without filling the petals.
This style uses very little thread and allows the fabric to remain visible. Black, burgundy, dark green, or muted pink thread can create a clean modern appearance.
2. Tiny Rose Cluster
Create several miniature roses arranged closely together. Each flower can be made from a few curved stitches rather than a completely filled shape.
Add tiny leaves using straight stitches or fishbone stitch. Varying the rose sizes prevents the cluster from looking too uniform.
3. Single Stem Rose
Create one long-stemmed rose with a large flower at the top and two or three leaves along the stem.
Use stem stitch for the curved stem and satin stitch or split stitch for the rose. This simple composition works particularly well in a small embroidery hoop.
4. Rosebud Embroidery
Instead of stitching an open flower, create several closed rosebuds at different stages of growth.
Use curved lines to define the bud and small green stitches for the sepals. Combining unopened buds with leaves gives the pattern a natural botanical appearance.
5. Side-View Rose
Create a rose viewed from the side rather than directly from above. Use curved overlapping lines to suggest the petals.
This is a useful design for practicing petal direction because the flower does not rely on a perfectly circular shape.
Textured and Dimensional Rose Embroidery
6. Woven Wheel Rose
The woven wheel rose is one of the most recognizable dimensional embroidery techniques. Begin with several straight foundation stitches radiating from a central point.
Weave another thread over and under the foundation stitches until the flower develops a rounded rose shape. Avoid pulling the weaving thread too tightly because some looseness helps create the raised texture.
7. Layered Satin Stitch Rose
Create individual petals using satin stitch, working from the center outward. Change the direction of the stitches according to the shape of each petal.
Use lighter thread toward the outer petals and darker shades near the center for a layered appearance.
8. French Knot Rose
Create a textured rose using clusters of French knots rather than smooth filled petals. Concentrate darker knots near the center and gradually use lighter shades toward the edges.
This approach produces a highly tactile flower and is useful when you want a loose, artistic interpretation.
9. Raised Petal Rose
Build the flower from individually raised petals. Outline each petal and use padded or layered stitching to give selected sections extra height.
This technique requires more patience than a basic outline rose, but the raised surface creates a noticeable three-dimensional effect.
10. Ribbon-Style Rose Embroidery
Use embroidery ribbon or a suitable ribbon-embroidery technique to form soft petals around the flower center.
Ribbon can create broader petals than ordinary embroidery floss, so it works particularly well for large decorative roses. Secure the ribbon carefully on the back to prevent loose ends.
Artistic Rose Patterns and Color Styles
11. Vintage Rose Bouquet
Create a bouquet containing several roses surrounded by leaves and smaller filler flowers.
Use dusty pink, cream, burgundy, muted green, and brown shades for a vintage-inspired palette. Small French knots can fill gaps between larger flowers.
12. Monochrome Rose Embroidery
Use one color in several shades to create the entire rose. For example, combine pale pink, medium pink, and deep rose thread.
The monochromatic approach emphasizes shape and stitch direction rather than relying on many contrasting colors.
13. Blackwork Rose
Create a rose using mostly black or very dark thread and decorative line patterns. Instead of filling petals completely, use repeated geometric marks, dots, crosshatching, and curved lines.
This style gives a traditional flower a graphic and contemporary appearance.
14. Watercolor-Style Rose
Create a soft rose using several closely related thread colors. Blend pale, medium, and darker shades gradually rather than creating sharply separated sections.
Long-and-short stitching can be useful for creating gradual color transitions in larger petals.
15. Abstract Rose
Simplify the rose into unusual curves, loops, and irregular petal shapes. The goal is not botanical accuracy but artistic interpretation.
Combine different stitch types within the same flower—for example, backstitch outlines, French knots in the center, and small satin-stitched sections.
Rose Embroidery Projects for Gifts and Decoration
16. Rose Initial Embroidery
Combine a large embroidered initial with roses and leaves around its edges. The letter can be outlined or filled depending on the desired style.
Choose small roses for a delicate appearance or one large rose as the main decorative element.
17. Rose Corner Embroidery
Place a small group of roses in one corner of a fabric square. This arrangement works especially well for handkerchiefs, fabric napkins, pillow covers, and decorative cloth.
Keep the center of the fabric mostly open so the corner motif remains the visual focus.
18. Rose Border Pattern
Create a repeating line of roses along the edge of fabric. Alternate open roses, buds, leaves, and small dots to prevent the border from becoming repetitive.
This pattern can be adapted to tote bags, table linens, clothing, bookmarks, or fabric accessories.
19. Rose Embroidered Bookmark
Create a narrow fabric bookmark decorated with one or several small roses. Use a long vertical arrangement instead of a wide floral composition.
Backstitch outlines and tiny satin-stitched petals can keep the design lightweight and practical.
20. Rose Hoop With Personalized Quote
Create a central rose surrounded by leaves and add a short personalized phrase around the design.
Use simple lettering so the text does not compete with the flower. A circular hoop provides a natural frame for the composition and can be displayed as handmade wall art.
Helpful Stitches for Rose Embroidery
Backstitch
Backstitch is useful for creating rose outlines, stems, lettering, and fine decorative lines. It produces a relatively continuous line and is easy to control.
Satin Stitch
Satin stitch is useful for filling petals and leaves with smooth thread coverage. Keep stitches close together and follow the direction of the petal.
Split Stitch
Split stitch creates a textured outline that can work well around curved rose petals. It is particularly useful when you want a slightly softer-looking line.
French Knots
French knots can represent rose centers, pollen-like details, decorative dots, or textured petals. Their raised surface adds dimension to otherwise flat embroidery.
Woven Wheel Stitch
Woven wheel stitch is particularly effective for creating raised roses. The foundation stitches determine the overall size of the flower, while the woven thread creates the visible petals.
Choosing Colors for Rose Embroidery
Traditional Pink Roses
Combine pale pink, medium pink, and deeper rose shades to create a classic floral palette. Add two or three greens for leaves.
Red and Burgundy Roses
Dark red, crimson, burgundy, and wine shades can create a dramatic design. Using a lighter red near the outer petals can prevent the flower from becoming visually flat.
White Roses
White roses can be stitched using cream, ivory, pale gray, and very light pink threads. Slight color changes help separate individual petals.
Unusual Rose Colors
Blue, lavender, peach, coral, mustard, or even black roses can create an artistic rather than realistic appearance.
Practical Facts for Better Rose Embroidery
Petal Direction Matters
Rose petals curve and overlap, so changing stitch direction according to each petal can make a filled flower appear more natural.
Smaller Roses Need Simpler Details
A tiny rose cannot accommodate as many individual stitches as a large rose. For miniature flowers, simplified outlines and a few curved stitches are often more effective.
Thread Thickness Changes the Appearance
Using more strands creates heavier stitches and stronger visual lines, while fewer strands can create delicate details.
Hoops Help Maintain Tension
Keeping fabric evenly stretched can make it easier to produce consistent stitches and reduce unwanted puckering.
How to Create a Rose Embroidery Pattern
Sketch the Center First
Start with the innermost rose shape and gradually add larger curved petals around it. This gives the flower a clear center and makes the overlapping structure easier to understand.
Add Leaves After the Flower
Once the rose is complete, place leaves around the stem or flower. This prevents the foliage from interfering with the main flower shape.
Plan Your Stitch Types
Decide which areas will be outlines, fills, knots, or raised sections before beginning. A simple stitch map can save thread and reduce unnecessary reworking.
Frequently Asked Questions
What is the easiest rose embroidery technique for beginners?
A simple outline rose using backstitch or split stitch is one of the easiest approaches. It allows beginners to practice curves without needing to fill the entire flower.
What stitch is best for making a raised rose?
Woven wheel stitch is a popular choice for creating a raised rose with embroidery floss. Ribbon embroidery can also create dimensional petals.
How many colors should I use for a rose?
There is no fixed number. A simple rose can use one color, while a shaded flower might use three to five closely related colors.
Can I embroider roses on clothing?
Yes. Roses can be added to jackets, shirts, denim, collars, pockets, and other suitable woven fabrics. Choose the design density according to how much movement and wear the garment receives.
How do I make embroidered roses look realistic?
Pay attention to petal direction, overlapping shapes, shading, and color transitions. Using lighter and darker thread in appropriate areas can help suggest depth.
Can I make tiny rose embroidery?
Yes. Tiny roses can be created using simplified curved lines, small satin stitches, French knots, or miniature woven wheels. Avoid adding too many details to very small flowers.
What fabric is good for rose embroidery?
Medium-weight cotton and linen are commonly suitable for hand embroidery. The best choice depends on the stitch density and the final purpose of the project.
Can rose embroidery be used for handmade gifts?
Yes. Rose motifs can be incorporated into hoops, bookmarks, tote bags, handkerchiefs, clothing, initials, personalized fabric pieces, and decorative items.