20 Oven Baked Clay Projects | Creative DIY Fun
Oven-baked clay, especially polymer clay, is ideal for creating small decorative projects, jewelry, miniatures, charms, and personalized gifts. These oven baked clay projects use different shapes, textures, patterns, and techniques so you can experiment with both simple and detailed designs.
Cute Oven Baked Clay Projects
1. Mini Clay Mushrooms
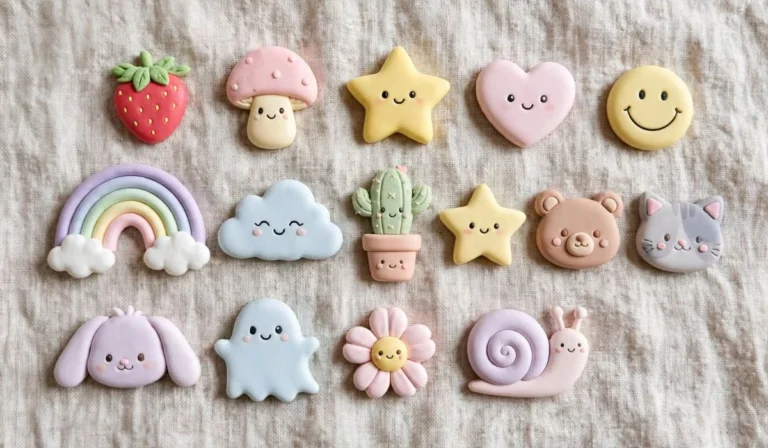
Create tiny mushroom caps in red, orange, purple, or pastel shades and add small dots across the surface. Pair them with short stems for a whimsical woodland collection.
2. Clay Animal Charms
Make miniature cats, dogs, bears, frogs, or rabbits from polymer clay. Add a small eye pin before baking if you want to turn the finished pieces into charms.
3. Tiny Clay Food
Create miniature strawberries, cakes, donuts, cookies, or ice cream cones. Layering different clay colors can make tiny food designs look surprisingly detailed.
4. Cute Cloud Charms
Shape white or pastel clay into small clouds and add tiny stars, rainbows, or smiling faces. These can work as decorative charms or miniature ornaments.
5. Mini Rainbow
Roll several thin clay ropes in different colors and curve them into a rainbow shape. Add small clouds at both ends for a cheerful design.
Jewelry Oven Baked Clay Projects
6. Polymer Clay Earrings
Cut polymer clay into circles, arches, flowers, leaves, or geometric shapes. Combine contrasting colors or textures to create handmade statement earrings.
7. Clay Pendant Necklace
Make a small pendant using a heart, moon, flower, mushroom, or abstract shape. Add a suitable jewelry finding before baking when appropriate for the specific design.
8. Marbled Clay Beads
Twist two or more contrasting clay colors together and gently roll them to create a marble pattern. Cut the clay into beads and make sure each bead has an appropriate hole before baking.
9. Floral Clay Rings
Create tiny flowers from thin clay petals and attach them to a suitable ring base. Different petal arrangements can produce daisy, rose, or wildflower-inspired designs.
10. Clay Bracelet Beads
Make colorful round, oval, or geometric beads and arrange them into a coordinated bracelet. Alternating shapes can give the finished piece a more interesting pattern.
Decorative Oven Baked Clay Projects
11. Mini Clay House
Build a tiny house with a roof, windows, door, and decorative details. Use different colors for the walls and roof to create a miniature village-style display.
12. Polymer Clay Plant Pot
Create a miniature decorative pot with raised flowers, leaves, dots, or geometric patterns. Make sure any actual plant-use application is appropriate for the finished clay and its intended exposure.
13. Clay Photo Frame Decorations
Create small flowers, stars, hearts, mushrooms, or animals and use them to decorate a suitable frame after the clay pieces have been baked and cooled.
14. Clay Wall Hanging
Make several flat clay shapes such as moons, stars, leaves, or flowers. Create holes before baking if they need to be connected with string afterward.
15. Miniature Garden Scene
Combine tiny flowers, mushrooms, stones, benches, or animals into a small clay landscape. Varying heights and textures can make the miniature scene more visually interesting.
Creative Oven Baked Clay Ideas
16. Clay Checkerboard Pattern
Create thin strips of two contrasting clay colors, arrange them into a checkerboard pattern, and slice the resulting sheet into decorative pieces.
17. Clay Faux Terrazzo Tray
Combine small pieces of contrasting clay and press them into a base color. Once arranged, flatten the surface carefully to create a terrazzo-inspired pattern.
18. Polymer Clay Bookmarks
Create a flat decorative clay topper featuring flowers, stars, animals, or abstract shapes. Attach it to a suitable bookmark material after curing.
19. Clay Incense Holder
Shape a small decorative holder with a stable base and an appropriately sized opening for the intended incense product. Keep the design away from flammable materials and follow safe-use instructions.
20. Personalized Clay Initials
Create individual letters or initials and decorate them with flowers, dots, hearts, stars, or miniature patterns. These can become personalized ornaments, charms, or decorative pieces.
Tips for Oven Baked Clay Projects
Condition the Clay Properly
Kneading and conditioning polymer clay helps make it more flexible and workable. Follow the manufacturer’s directions for the specific clay because different brands can have different preparation requirements.
Create Details Before Baking
Add textures, patterns, holes, facial features, and other structural details while the clay is still workable. It is much easier to make these changes before curing.
Keep Pieces Evenly Thick
Very uneven pieces can cure differently. For projects with multiple components, aim for consistent thickness where practical and follow the product’s baking guidance.
Follow the Package Temperature
Polymer clay products vary in recommended baking temperature and time. Use the manufacturer’s instructions rather than assuming every polymer clay should be baked at the same temperature.
Allow Finished Pieces to Cool
Baked clay can remain hot and relatively delicate immediately after coming out of the oven. Let pieces cool completely before attaching hardware, sanding, painting, or handling them extensively.