30 Clay Animals Ideas | Creative Clay Craft Inspiration


Clay animals are a fun way to practice sculpting while creating colorful miniatures, decorations, ornaments, figurines, jewelry charms, and imaginative handmade artwork. A simple ball, cylinder, cone, or flattened clay shape can become the foundation for an animal with only a few carefully added details.
Polymer clay is useful for small detailed figures because it can be shaped and cured according to the manufacturer’s instructions. Air-dry clay is another option for decorative sculptures and larger lightweight projects. The right material depends on the size, detail level, and intended use of the finished animal.
These 30 clay animals ideas explore four different styles, including woodland creatures, farm and domestic animals, unusual wildlife, and tiny fantasy-inspired designs.
Woodland and Forest Clay Animals
1. Clay Fox
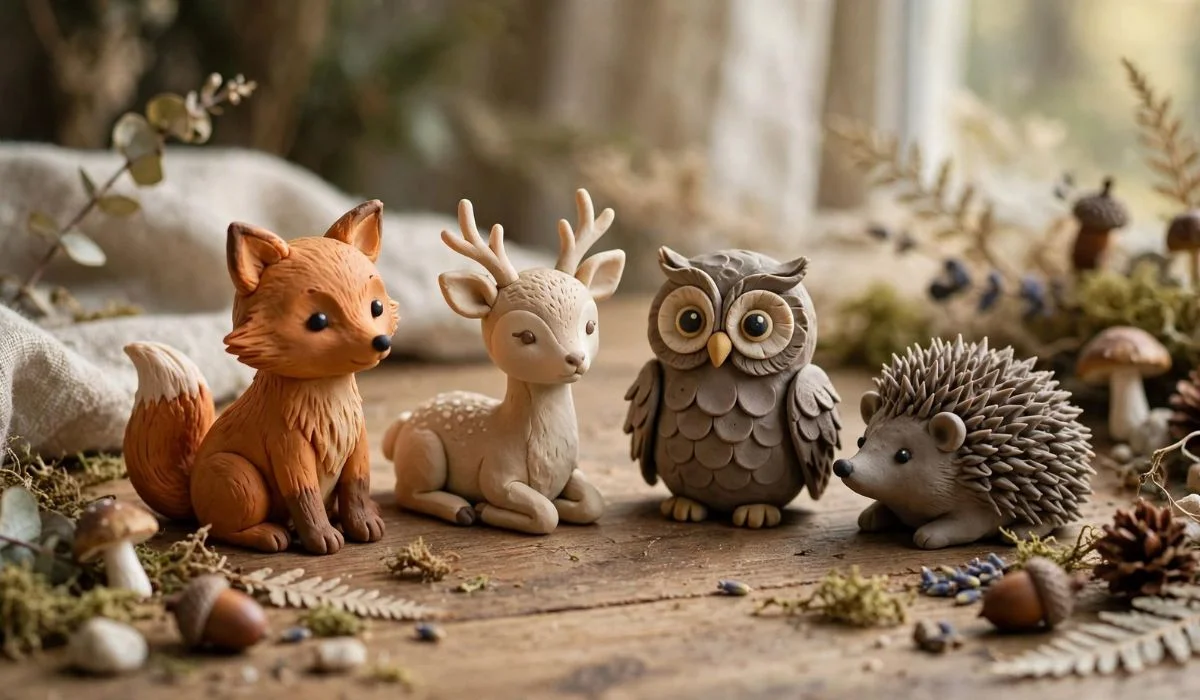
Create a small sitting fox using orange or rust-colored clay. Shape the body into a rounded form, then add a pointed snout, triangular ears, white chest, and curled tail.
A darker orange or brown shade can be used for the legs and tail tip to give the miniature more visual depth.
2. Clay Hedgehog
Form a rounded body and add a small pointed face. Instead of sculpting every individual spine, create rows of textured clay or use a suitable modeling tool to suggest the prickly surface.
A tiny black nose and small eyes complete the design.
3. Clay Squirrel
Make a miniature squirrel with a large curved tail. Use several clay pieces to build the body, legs, head, and tail before carefully joining them.
Add a tiny acorn to its paws for a more recognizable woodland scene.
4. Clay Owl
Create a rounded owl body with large circular eyes and a small beak. Layer small clay pieces around the eyes to create feather-like texture.
Use brown, cream, gray, or unusual colors for a stylized rather than realistic appearance.
Read Next:
20 Rose Embroidery Tutorial
5. Clay Deer
Shape a small deer with a slender body and four legs. Add ears and small antlers using carefully formed clay pieces.
For a beginner-friendly version, make the deer sitting down and keep the legs short and sturdy.
6. Clay Raccoon
Create a gray raccoon with a rounded body and distinctive dark markings around the eyes.
A striped tail can be made by attaching alternating gray and dark clay sections before carefully blending or joining them.
7. Clay Bear
Make a simple bear using rounded body parts and small circular ears. Add a lighter muzzle and belly for contrast.
You can create a standing bear, sitting bear, or tiny bear holding a miniature flower or honey pot.
8. Clay Rabbit
Create a rabbit with long ears, a rounded body, and a small fluffy-looking tail.
For a spring-inspired version, add a miniature carrot, flower, or basket beside the rabbit.
Farm and Familiar Clay Animals
9. Clay Cow
Build a small cow using a rounded white body and black or brown patches. Add short legs, ears, horns, and a simple muzzle.
Instead of making random spots, place them deliberately to create a balanced miniature design.
10. Clay Pig
Create a pink pig with a rounded body, short legs, triangular ears, and a curled tail.
A small darker-pink snout with two tiny nostrils gives the face more character.
11. Clay Chicken
Shape a small chicken from a rounded body with a slightly pointed head. Add a small beak, comb, wings, and tail feathers.
White, cream, yellow, and brown combinations can create several different chicken styles.
12. Clay Duck
Create a yellow duck with an orange bill and feet. A simple rounded body makes this an accessible project for beginners.
Add a tiny pond base using blue clay to turn the single animal into a miniature scene.
13. Clay Sheep
Use a rounded body covered with small clay balls or textured sections to suggest wool.
Keep the head and legs relatively simple so the textured body remains the main feature.
14. Clay Horse
Build a miniature horse using a long body, four legs, a neck, and a head. Add a flowing mane and tail using thin clay strips.
For a simpler project, make a standing horse silhouette rather than a highly detailed realistic sculpture.
15. Clay Goat
Create a small goat with a compact body, pointed ears, short horns, and a small beard.
Gray, cream, brown, and white clay can be combined to produce different goat patterns.
Wild and Unusual Clay Animals
16. Clay Elephant
Create an elephant with a rounded body, large ears, four short legs, and a curved trunk.
Large ears can be made from thin flattened clay, but avoid making them extremely thin if the finished figure needs to withstand handling.
17. Clay Giraffe
Build a small giraffe using yellow or golden clay with brown spots. The long neck and legs can be supported with slightly thicker clay sections.
A darker mane along the neck adds a recognizable detail.
18. Clay Zebra
Create a small horse-like body and cover it with alternating black and white stripes.
Rather than trying to sculpt every stripe individually, thin strips of clay can be applied carefully to the surface.
19. Clay Penguin
Make a rounded penguin using black and white clay with a small orange beak and feet.
A blue or white clay base can turn the figure into a simple winter-themed miniature.
20. Clay Panda
Create a rounded black-and-white panda with dark ears, eye patches, arms, and legs.
A sitting pose makes the figure more stable and allows you to add a tiny bamboo shoot.
21. Clay Sloth
Create a sloth hanging from a curved branch or sitting in a relaxed position. Use brown and cream shades for the body and face.
Long arms and curved claws make the animal recognizable even when the sculpture is highly simplified.
22. Clay Flamingo
Create a pink flamingo with a long curved neck and one or two thin legs. For a more durable miniature, use slightly thicker proportions.
A small blue clay puddle can provide a simple base.
23. Clay Koala
Make a gray koala with large rounded ears and a dark oval nose.
Add a small eucalyptus branch or leaf to create a recognizable Australian-inspired miniature.
Ocean, Small, and Fantasy-Inspired Clay Animals
24. Clay Turtle
Create a rounded turtle shell using green or brown clay. Add a small head, four feet, and a short tail.
Use a modeling tool to create a simple shell pattern instead of making every section from separate clay pieces.
25. Clay Whale
Shape a smooth whale body with a rounded head and tapered tail. Add a small water spout above the head using thin clay shapes.
Blue, gray, turquoise, and even pastel colors can work for a stylized version.
26. Clay Octopus
Create an octopus with a rounded head and eight tentacles. Curl the tentacles into different positions to make the sculpture feel lively.
Tiny dots or suction-cup markings can be added with a fine modeling tool.
27. Clay Seahorse
Create a small seahorse using a curved body, raised snout, dorsal details, and curled tail.
Because the shape is relatively narrow, a simplified version with thicker sections can be easier for beginners.
28. Clay Axolotl
Create a cute axolotl using a rounded body, small legs, a wide head, and feathery external gills.
Pink, peach, white, lavender, and orange are popular choices for whimsical interpretations.
29. Clay Dragon
Create a miniature fantasy dragon using a rounded body, wings, horns, tail, and tiny spikes.
You can simplify the anatomy for a cute character style or add scales and textured wings for a more detailed sculpture.
30. Clay Unicorn
Build a small horse-like body with a horn and flowing mane. Add pastel colors, stars, or tiny flowers for a fantasy-inspired design.
A sitting unicorn can be easier to stabilize than a standing figure with very thin legs.
Clay Shapes That Make Animal Sculpting Easier
Rounded Forms
Balls and rounded shapes are useful for heads, bodies, cheeks, paws, and other soft animal features. Many beginner animal sculptures can be constructed primarily from rounded forms.
Cylinders
Cylinders work well for legs, tails, horns, trunks, and necks. Keeping them slightly thicker can help prevent fragile pieces from breaking.
Flattened Shapes
Flattened clay is useful for ears, wings, leaves, fins, and shells. Use a consistent thickness when making matching parts such as ears or wings.
Thin Details
Small details such as whiskers, claws, horns, or antennae require extra care. For frequently handled pieces, slightly thicker details are generally more durable.
Choosing Clay for Animal Figures
Polymer Clay
Polymer clay is suitable for detailed miniature animals, charms, jewelry components, and small figurines. It remains workable until cured and should be baked according to the manufacturer’s instructions.
Air-Dry Clay
Air-dry clay can be useful for larger decorative animal sculptures and projects that do not require oven curing. Drying time depends on thickness, humidity, and the product.
Practical Facts for Clay Animal Projects
Proportions Affect Stability
Very large heads or extremely thin legs can make a miniature animal difficult to balance. Beginners can make figures more stable by using a wider base and slightly thicker legs.
Symmetry Helps With Paired Features
When making ears, eyes, legs, wings, or other paired parts, compare them before attaching them permanently. Similar dimensions create a more balanced appearance.
Texture Adds Character
Tools can be used to create fur, feathers, scales, shells, or wrinkles. Different animals benefit from different surface textures.
Details Should Match the Scale
A miniature animal does not need dozens of tiny details. A few recognizable features—such as a trunk for an elephant or stripes for a zebra—can communicate the animal effectively.
Tips for Making Clay Animals
Build the Body First
Start with the largest shape before adding small features. This gives you a stable foundation and makes it easier to judge the proportions.
Add Facial Features Last
Eyes, noses, mouths, and other tiny details can change the expression significantly. Adding them near the end gives you more control.
Blend Carefully
When joining clay pieces, blend connection points where appropriate. For removable or sharply defined components, preserve the intended separation instead.
Cure or Dry Correctly
Polymer clay requires curing according to its manufacturer’s instructions, while air-dry clay needs adequate drying time. Avoid assuming that all clay products use the same temperature or drying process.
Creating Miniature Animal Scenes
Woodland Scene
Combine a fox, mushroom, tree stump, leaves, and tiny acorns to create a miniature forest environment.
Farm Scene
Place a cow, chicken, pig, and sheep around a small clay barn or fence.
Ocean Scene
Combine a whale, turtle, octopus, and fish with a blue clay base and small sea plants.
Fantasy Scene
Create a dragon, unicorn, mushrooms, stars, and miniature clouds for a magical display.
Frequently Asked Questions
What are the easiest clay animals for beginners?
Simple animals such as rabbits, ducks, pigs, turtles, penguins, and frogs can be good starting projects because they can be constructed from basic rounded shapes.
What clay is best for making miniature animals?
Polymer clay is useful for small detailed figures, while air-dry clay can be suitable for decorative sculptures. The choice depends on the project’s size, intended use, and the manufacturer’s instructions.
How do I stop clay animal legs from breaking?
Avoid making legs extremely thin, especially on figures that will be handled frequently. Slightly thicker legs and a stable body position can improve durability.
Can children make clay animals?
Yes, many simple clay animals are suitable for children when the material and tools are age-appropriate. Young children should be supervised, particularly when projects contain tiny pieces.
How do I make clay animals look more realistic?
Focus on proportions, characteristic shapes, surface texture, and recognizable markings. You do not need to reproduce every anatomical detail to create a convincing miniature.
Can I paint clay animals?
Some fully dried air-dry clay projects can be painted with acrylic paint. Polymer clay may also be decorated with compatible paints or finishes. Always check the manufacturer’s recommendations.
How long do clay animal projects take?
Small simplified animals may be completed relatively quickly, while detailed figures can require considerably more time. Drying or curing time is separate from the actual sculpting time.
Can clay animals be used as charms?
Small polymer clay animals can be adapted into charms when the design is appropriately sized and a suitable attachment is securely installed after curing.
How can I make a clay animal stand up?
Use a wide or stable base, balanced proportions, and sufficiently thick legs. For some larger sculptures, an appropriate internal support may be needed depending on the clay and design.